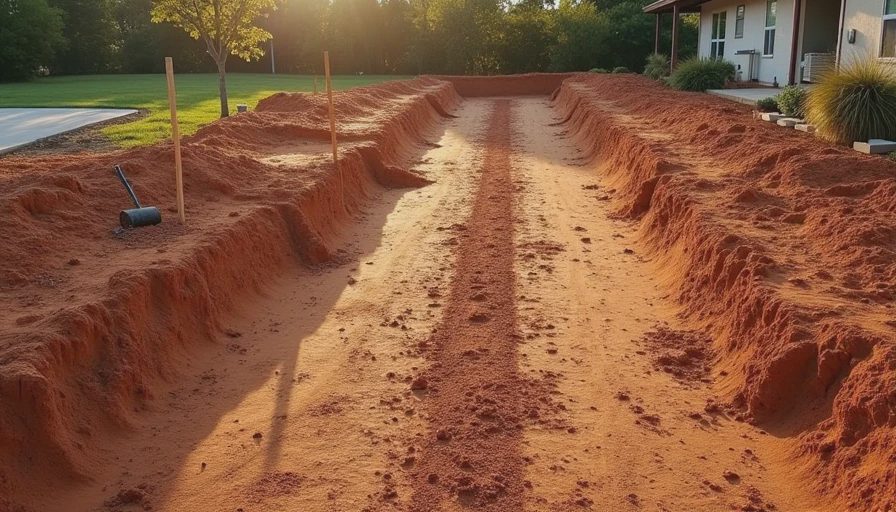
When we got the keys in late 2023, the front yard looked decent thanks to the builder’s sod, but the backyard? It was a crime scene. Red North Carolina clay, random rocks, a few sad patches of weeds, and one lonely tree the builder left as a “mature specimen.” Charlie took one look and asked if we moved to the moon. Fair question.
I’d seen this movie a hundred times during my Pulte days. Buyers get so excited about the shiny kitchen that they forget the backyard is basically a construction site when you close. Then reality hits: mud tracked into the new house, kids with nowhere to play, and that giant “future patio” area staring at you every morning.
Here’s what we actually did in year one, what I’d do differently, and the exact priority list that kept us sane and under budget.
The Dirt Patch Reality Check
New construction lots are graded for drainage first, aesthetics second. Ours had a slight slope toward the house (great for water management, terrible for my ego). The builder had spread some seed and called it a day. By the first heavy rain, we had rivers of mud washing toward the foundation.
Lesson number one: don’t panic and throw money at everything. Year one is about survival and smart foundations, not Instagram-worthy gardens.
Year One Backyard Priorities (The Order That Saved Us)
1. Drainage and Grading – Do This First or Cry Later
We paid a local landscaper $1,800 to fix the grading around the foundation and add a few French drains where water pooled. I watched too many neighbors fight foundation moisture issues because they skipped this.
Pro tip from my builder days: if your lot has any low spots near the house, handle it before you plant anything permanent. We also installed a simple downspout extension system for $120 at Home Depot. Cheap insurance.
2. Basic Turf or Ground Cover – Make It Usable
We didn’t sod the whole yard. That would’ve been $8,000+. Instead, we seeded fescue in the main play areas ($280 for seed, fertilizer, and straw) and let the rest go to low-maintenance clover and native grass mix.
By Memorial Day, the kids had a decent patch to run around without coming inside looking like they’d been mud wrestling. Two years later, it’s still holding up better than I expected.
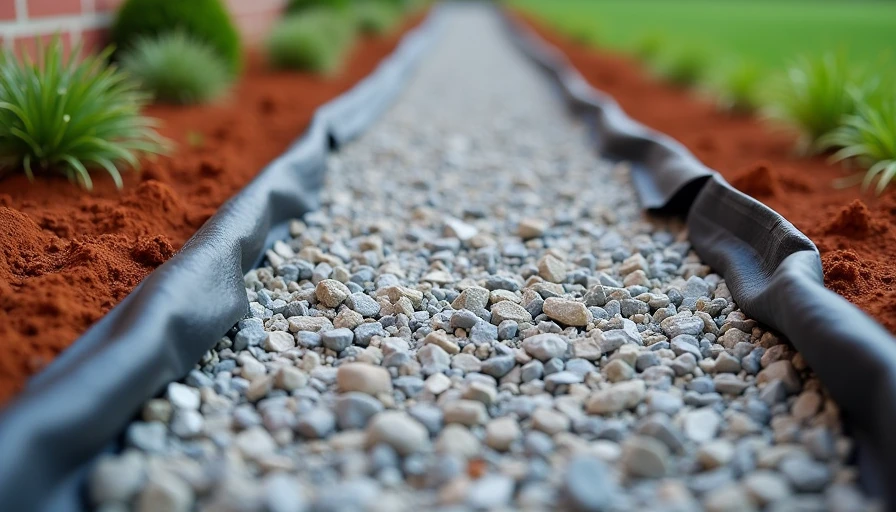
3. The Mudroom-to-Backyard Pathway
This was my smartest move. We laid a 4-foot-wide gravel path from the back door to the future patio area. Cost: $650 including landscape fabric and edging. No more tracking red clay into the new LVP floors. I cannot overstate how much this saved our sanity (and our cleaning supplies).
4. Simple Play Space for the Kids
We bought a $520 playset from a local Facebook Marketplace listing instead of the $2,000+ builder option. Added wood chips underneath for safety. Charlie and Emma basically lived out there all summer. Best money we spent.
What We Skipped (And Why I’m Glad)
Full irrigation system in year one. We used soaker hoses and a smart timer instead ($180 total). Saved $3,500+.
Fancy retaining walls or terraces. The natural slope works fine for now.
Mature trees and shrubs. We planted small and cheap. They’ll grow.
The Patio vs Deck Decision (That We Still Haven’t Fully Made)
I spent way too many evenings researching this. Concrete patio would’ve been $9,000–$12,000. Composite deck: similar. We ended up doing a gravel base with pavers in a small 12x16 area for $1,400 DIY over a couple weekends. It’s not fancy, but we eat dinner out there most nights and my offset smoker has a permanent home.
Budget Breakdown – Real Numbers
Grading & drainage: $1,800
Seed & basic turf: $280
Gravel path + edging: $650
Playset + safety surfacing: $680
Paver patio area: $1,400
Tools, soil, plants, misc: $920
Total Year One Backyard Spend: ~$5,730
That’s less than many people drop on one “upgrade” at closing. And our yard actually gets used every single day.
The Smoker Station Tangent (Because Priorities)
Yes, I built a full offset smoker station with a concrete pad and roof before we had proper landscaping. Megan still rolls her eyes, but those briskets don’t cook themselves. Sometimes you do the fun project first. No regrets.
What I’d Tell My Past Self
If you’re staring at your own dirt patch right now:
Walk the lot after a heavy rain. Mark every puddle and flow line.
Focus on the areas you’ll actually use in year one: play space, grill zone, pathway to the house.
Mulch is your friend. Cheap, effective, and makes everything look more intentional.
Plant perennials and small trees in fall or early spring when they’re cheaper and establish better.
Take progress photos. You’ll need them when the HOA complains about your “unfinished” yard.
Tools That Actually Helped
A good wheelbarrow (trust me)
Square point shovel for clay
Soil test kit from the extension office (free or cheap)
Landscape fabric and proper edging (don’t cheap out here)
The Bigger Picture
Backyards in new construction neighborhoods all start the same — ugly. The ones that look amazing five years later are the ones where owners made smart, phased decisions instead of trying to do everything at once.
We’re still not “done.” There’s no perfect landscape yet. But on Saturday mornings when we’re out there with the kids, chasing bubbles and burning slightly overcooked burgers, it feels like ours.
A new house isn’t perfect. But it can be yours.
And sometimes that starts with accepting the dirt patch… then doing something about it, one wheelbarrow at a time.
Your Year One Backyard Checklist
Walk lot after rain → fix major drainage
Create at least one mud-free path from house
Establish play/turf area for kids & dogs
Build basic outdoor cooking zone
Mulch and plant a few high-impact, low-cost perennials
Document everything for future phases
Print it. Stick it on the fridge. You’ve got this.
No letters yet — pray write the first.